Punctual Connect Guide
1. company login
2: company registration
3: . admin dashboard
4: employee management
5: add new employee
6: attendence monitoring
7: Leave Management
8: Admin Settings
9: Salary Management
10: Admin Profile
Punctual
Connect
USER MANUAL.
Comprehensive Employee Attendance & HR Management.
Screen 1: Company Login
This screen is used to securely log in to an existing company account and access the Punctual Connect dashboard.

OPEN THE LOGIN PAGE
Open the Punctual Connect application. By default, the Company Login tab will be selected.
ENTER EMAIL ADDRESS
Enter your registered company user email (e.g., admin@company.com).
ENTER PASSWORD
Enter your account password. Use the eye icon to show or hide it.
CLICK "SIGN IN TO DASHBOARD"
Click the button to log in. You will be redirected to your dashboard.
OPTIONAL - GO TO REGISTRATION
If your company has no account, click the Company Registration tab at the top.
🛡 Validation Rules
- Email must be registered in the system.
- Password must be exactly as created.
- Both fields are mandatory to proceed.
⛔ Common Errors
- Wrong email or password.
- Extra spaces while typing email.
- Using personal email instead of company email.
Screen 2: Company Registration
This screen is used to create a new company account and the first Admin user. Each company should register only once.

OPEN REGISTRATION TAB
On the login screen, click the Company Registration tab.
ENTER COMPANY NAME
Provide your official organization name (e.g., ABC Technologies Pvt Ltd).
ENTER ADMIN EMAIL
Provide the email address for system notifications and login.
ENTER PHONE NUMBER
Enter the company primary contact number.
ENTER COMPANY ADDRESS
Provide the full address (updatable later).
CREATE PASSWORD
Use a strong password (min 8 characters, mix of letters/numbers).
CONFIRM PASSWORD
Re-enter the same password to ensure they match.
UPLOAD COMPANY LOGO (OPTIONAL)
Click the upload area to select a PNG/JPG file (max 500 KB).
CLICK "CREATE COMPANY"
Complete registration to validate details and create your workspace.
LOGIN TO DASHBOARD
Return to the Login tab and enter your new admin credentials.
🛡 Validation Rules
- Company name is required.
- Email must be unique in the Punctual Connect database.
- Passwords must match exactly.
- Logo size must be ≤ 500 KB.
⛔ Common Errors
- Email already exists.
- Password mismatch.
- Uploading a logo larger than 500 KB.
Screen 3: Admin Dashboard
Provides a real-time overview of employee attendance and HR activity. Helps administrators monitor workforce status and pending tasks.

LOG IN AS ADMIN
After login, the system automatically opens the Admin Dashboard.
REVIEW SYSTEM BANNER
Check your subscription status and system title at the top.
CHECK TOTAL EMPLOYEES
View active vs total counts on the dedicated card.
CHECK TODAY ATTENDANCE
Monitor present employees vs expected count.
REVIEW PENDING LEAVES
Check for requests requiring attention.
MONITOR APPROVAL RATE
Track HR responsiveness stats.
VIEW RECENT ACTIVITY
Scroll to see the latest leave applications.
USE QUICK ACTIONS
Use the right panel to jump to Employee Management or Reports.
TOP NAVIGATION
Use icons to move between Attendance, Leaves, and Salary.
LOGOUT SECURELY
Click your profile to logout after your session.
🛡 Validation Rules
- Dashboard reflects real-time data sync.
- Access is restricted to Admin role users only.
⛔ Common Errors
- Ignoring pending leave requests for too long.
- Forgetting to logout on shared computers.
Screen 4: Employee Management
Used to add, view, search, filter, edit, and deactivate employees in the system.

Open Employee Management
Click "Employees Management" from the top navigation.
View Employee List
Review the table with Dept, Role, and Status columns.
Search Employee
Use the search field to filter by name or email.
Filter by Department
Use the dropdown to see specific teams.
Add New Employee
Click the "+ Add Employee" button in the top right.
Edit Employee
Use the Actions column to update existing records.
Deactivate Employee
Select Deactivate from actions to disable access.
Verify Status
Check for "Active" vs "Inactive" badges.
Review Joining Date
Verify employment timeline for audits.
Proceed to Tasks
Move to Attendance or Salary modules via top menu..
🛡 Validation Rules
- Email must be unique per employee
- Deactivated employees cannot log in.
- Active status is required for payroll processing.
Screen 5: Add New Employee
Create new accounts. Employees will be able to log in, mark attendance, and receive salary processing based on these details.
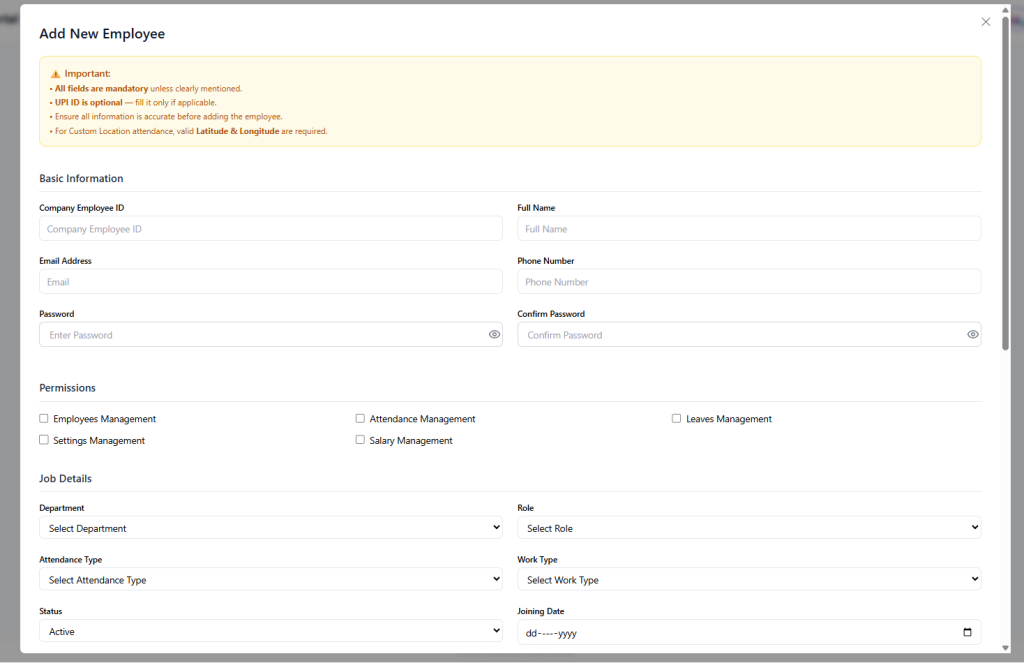
OPEN ADD FORM
Click "+ Add Employee" from the management screen.
BASIC INFO
Enter ID, Name, unique Email, and initial Password.
ASSIGN PERMISSIONS
Select modules (Leaves, Salary, etc.) the user can access.
JOB DETAILS
Select Department, Role, Attendance Type, and Work Type.
SET STATUS
Default is Active, account becomes usable immediately.
JOINING DATE
Select the start date for payroll calculations.
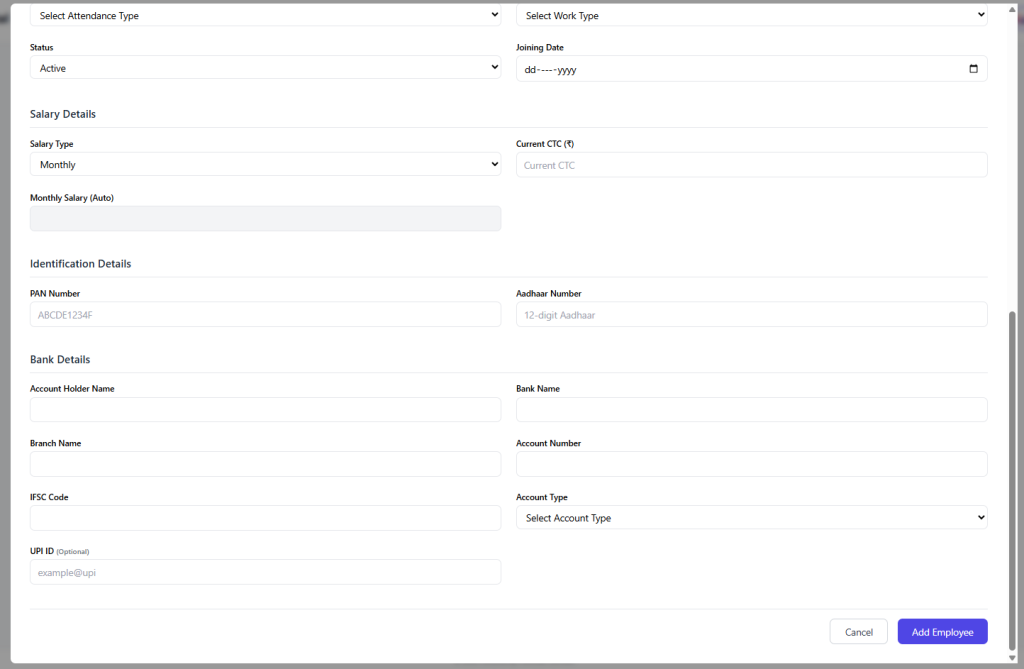
SALARY DETAILS
Enter Salary Type and CTC. Monthly salary calculates automatically.
IDENTIFICATION
Enter valid PAN and 12-digit Aadhaar numbers.
BANK DETAILS
Provide Account Name, Bank, Branch, IFSC, and Account Number.
SAVE EMPLOYEE
Click Save to validate fields and create the account.
🛡 Validation Rules
- All fields mandatory except UAN.
- PAN format must be valid (ABCDE1234F).
- IFSC code is required for automated salary transfers.
⛔ Common Errors
- Incorrect PAN or Aadhaar format.
- Giving unnecessary admin permissions to regular staff.
- Typo in bank account number.
Screen 6: Attendance Monitoring
Main source for payroll audits. View, filter, and export check-in/out times and working hours.
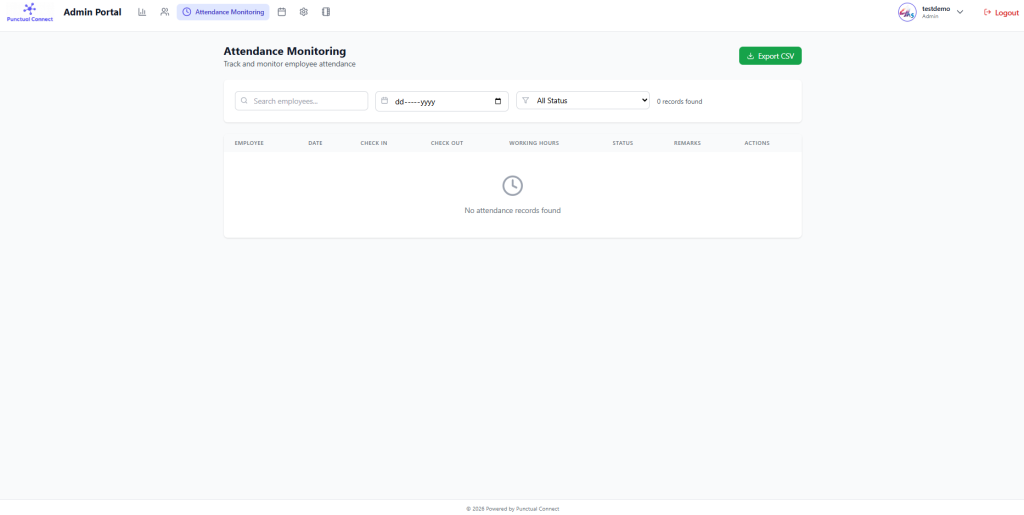
Open Monitoring
Click "Attendance Monitoring" from the top menu.
Search
Filter by employee name to check specific logs.
Filter By Date
Select a specific day to view who was on-site.
Filter By Status
Isolate "Late" or "Absent" employees.
Review Log
Check "Working Hours" (system calculated).
Export Data
Click "Export CSV" for your payroll records.
Review Remarks
Check for any system notes or check-in justifications.
Navigate
Move to Payroll or Leave modules after verification.
🛡 Validation Rules
- Working hours are automatically calculated by the system engine.
- Status (Late/Present) follows rules defined in Settings.
Screen 7: Leave Management
Review and action employee leave applications for workforce planning.
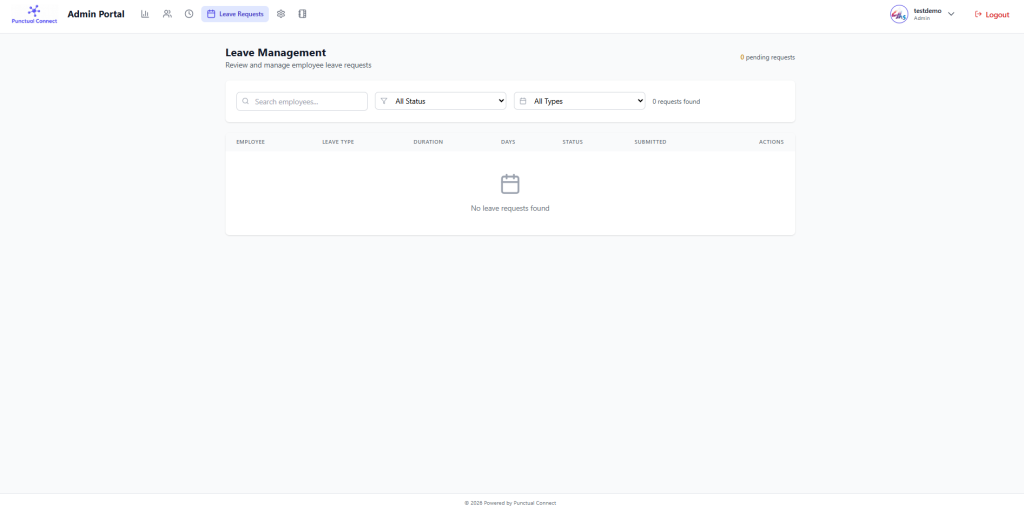
Open Requests
Navigate to "Leave Requests" from the navigation.
Check Pending Summary
View total requests requiring action at the top.
Search
Locate specific employee applications..
Filter Status
Focus on "Pending" to process new requests.
Filter Type
Check for Sick vs Casual leaves.
Review Row
Check "Duration" and "Days" columns.
Approve
Click Approve in actions to update attendance logs.
Reject
Click Reject and enter a reason if required..
Monitor History
Track patterns via Approved/Rejected filters.
Sync with payroll
Verify leave impact on monthly payouts.
🛡 Validation Rules
- Approved leaves automatically override attendance "Absent" status.
- Leave balance is checked against entitlements.
Screen 8: Admin Settings
Configure organisation structure, departments, roles, and attendance rules.
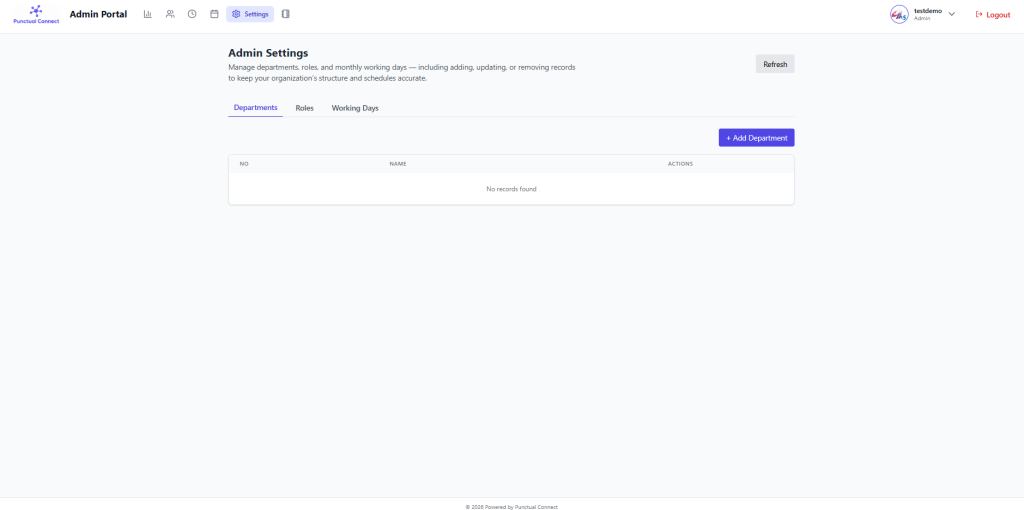
Open Settings
Select "Settings" from the top bar.
Manage Departments
Add (e.g., Sales, HR) or edit existing team names.
Manage Roles
Create roles (Manager, Lead) and set module permissions..
Configure Working Days
Toggle Monday-Sunday to define the work week.
Save Rules
These days dictate salary and attendance calculations.
Refresh Data
Use the top-right refresh button to sync multi-admin changes.
🛡 Validation Rules
- Department and Role names must be unique.
- Cannot delete roles/departments assigned to active employees.
Screen 9: Salary Management
Base module for payroll. Verify salary structures and CTC before generation.
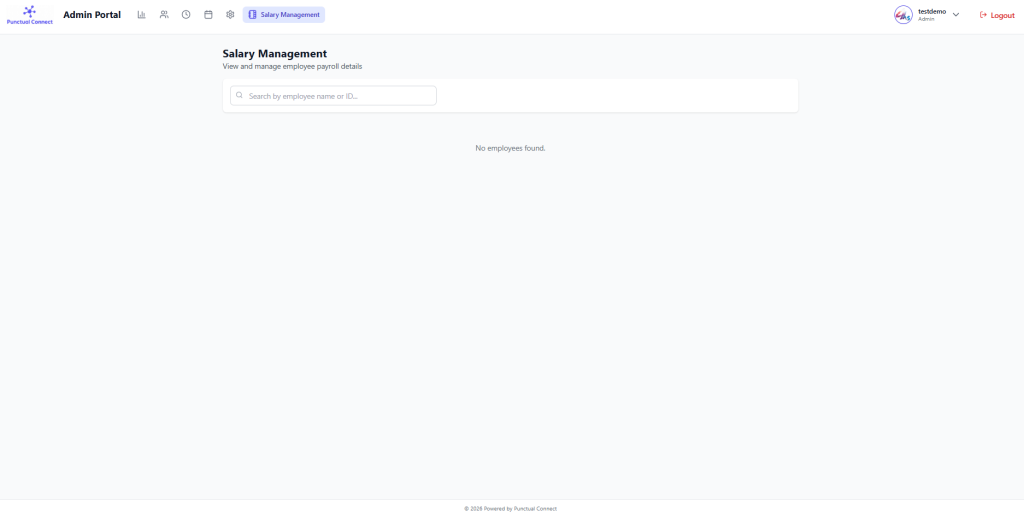
Open Salary Module
Navigate to "Salary Management".
Verify Layout
Check the list for all active employees.
Search
Filter by ID or Name to verify specific payouts.
Review Details
Check CTC vs Monthly Auto-Calculation.
Verify Allownances
Ensure deductions (PF/ESI) are configured..
Confirm Readiness
Check that bank details and status are valid.
Generate
Move to Payroll module to finalize the month.
🛡 Validation Rules
- CTC values must be numeric.
- Payroll cannot run for inactive employees.
Screen 9: Salary Management
Manage company identity and verify subscription status.
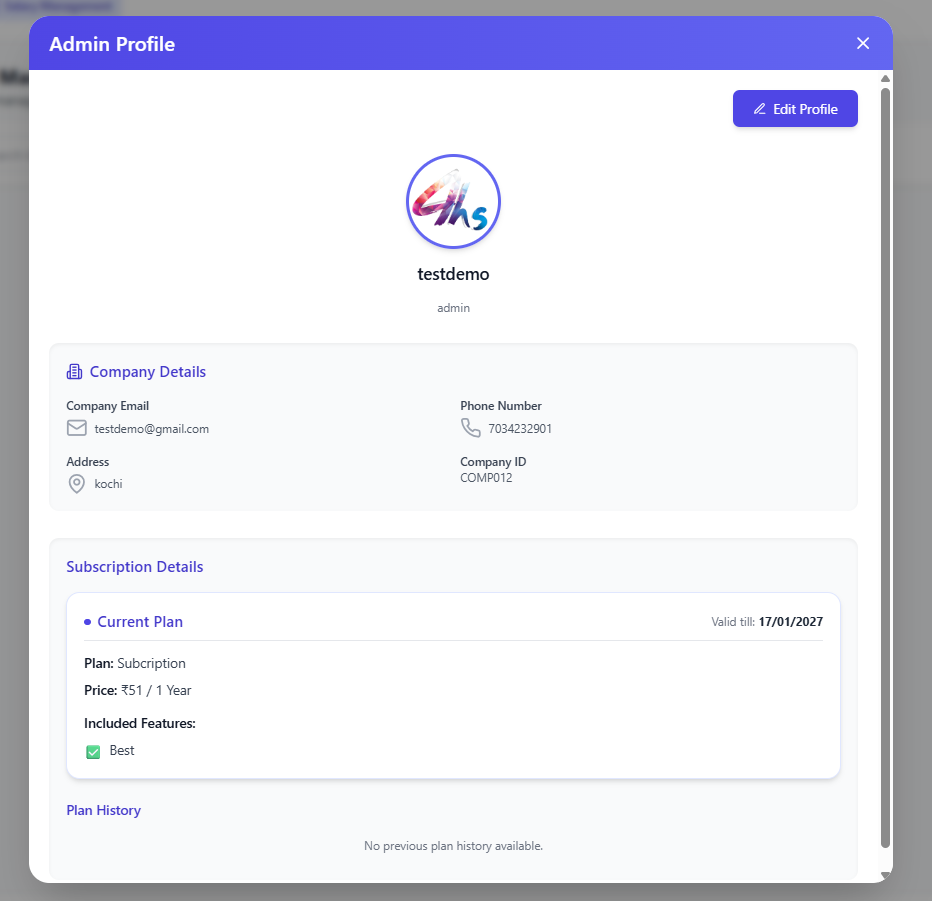
Open Profile
Click your profile icon at top-right.
Logo Update
Click the pencil icon to upload a new branded logo.
Edit Contact
Update official company email, phone, and address.
Verify ID
Check your unique system Company ID (Read-only).
Chcek Subscription
Review plan name, price, and "Valid till" date.
Save Changes
Click the green button to apply updates system-wide.
Cancel
Discard changes if you wish to keep old settings.
🛡 Validation Rules
- Company ID is a static system identifier.
- Valid subscription is required for dashboard access.